Prepare
- AWS account
- Your own domain (How to buy a domain name from Google Domains)
- Static website (Here use hugo to create a static website)
If you use Hugo to create a static website,
you need to modify baseURL param in config.toml
Fill in your url, e.g. https://blog.jihongo.com
Run CMD, and enter hugo command,
the website will be built to the public folder.
The files inside are the content of the entire website.
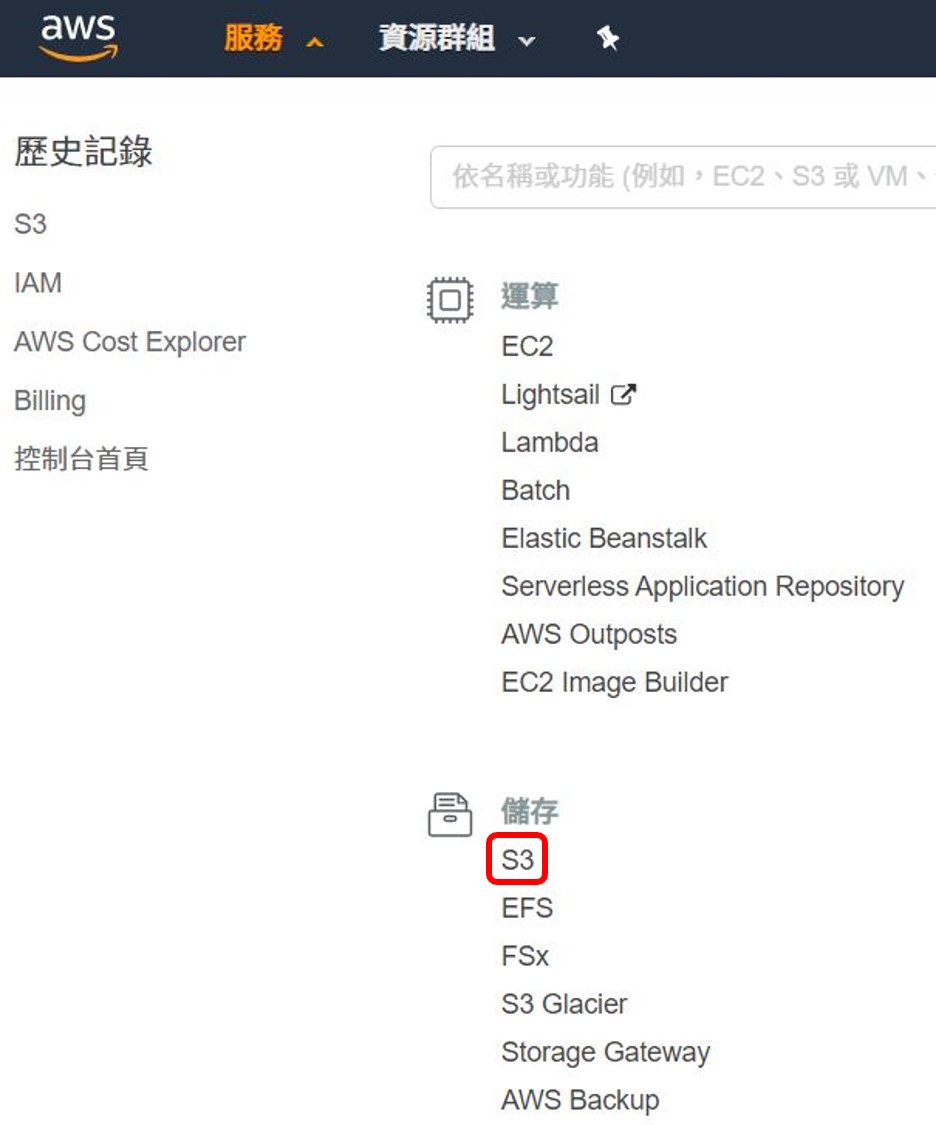
S3
First, Click S3
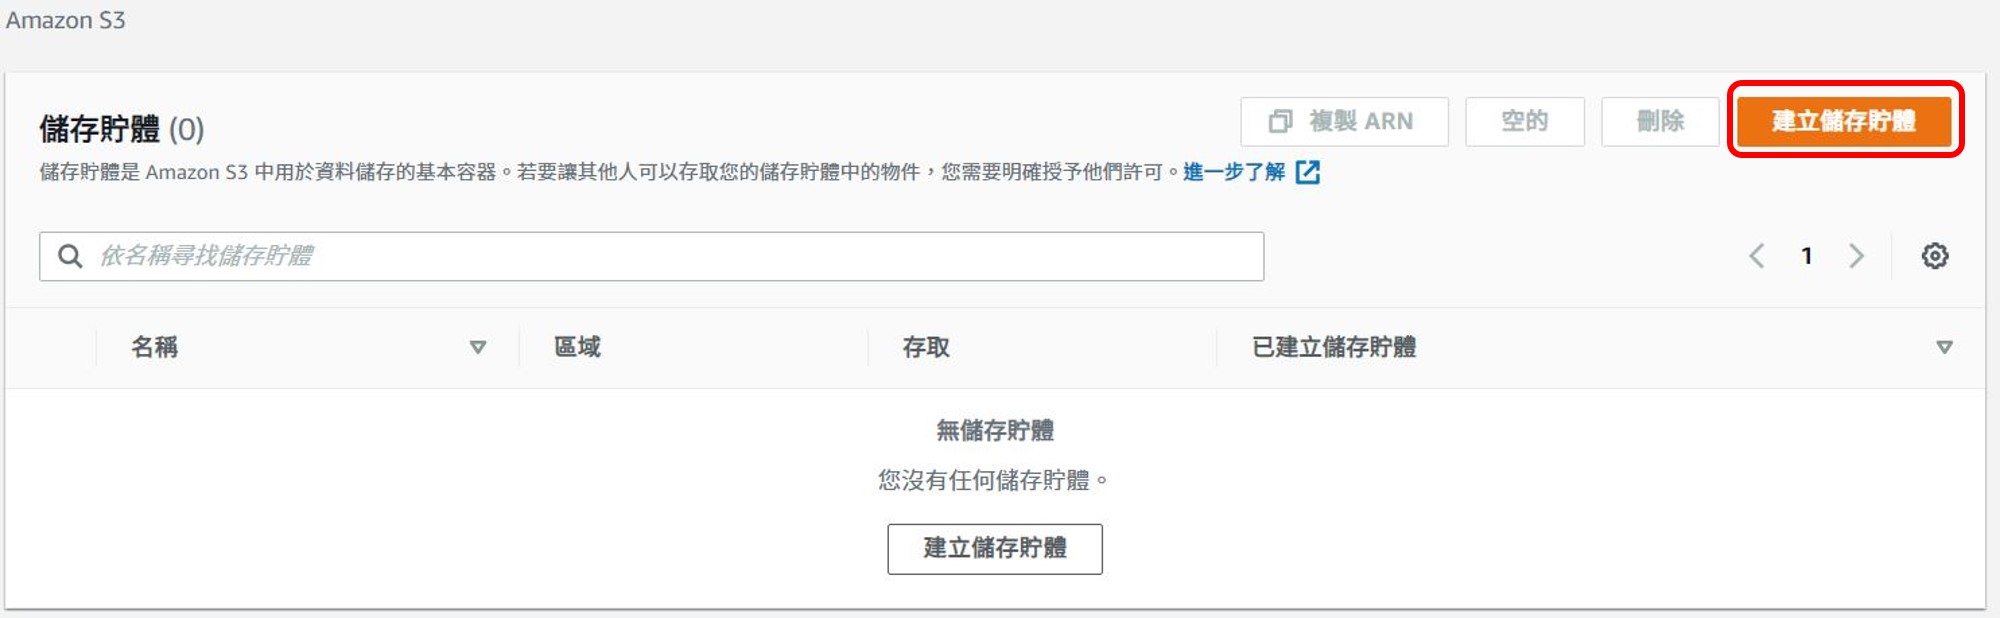
Click Create bucket
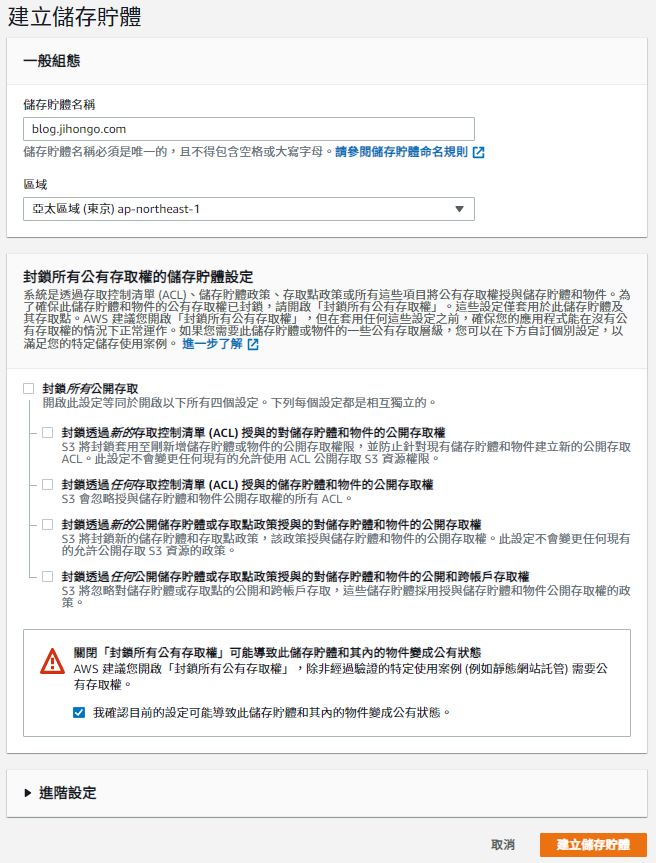
Fill in Bucket name, Region can select Tokyo or Singapore or others,
disable Block all public access
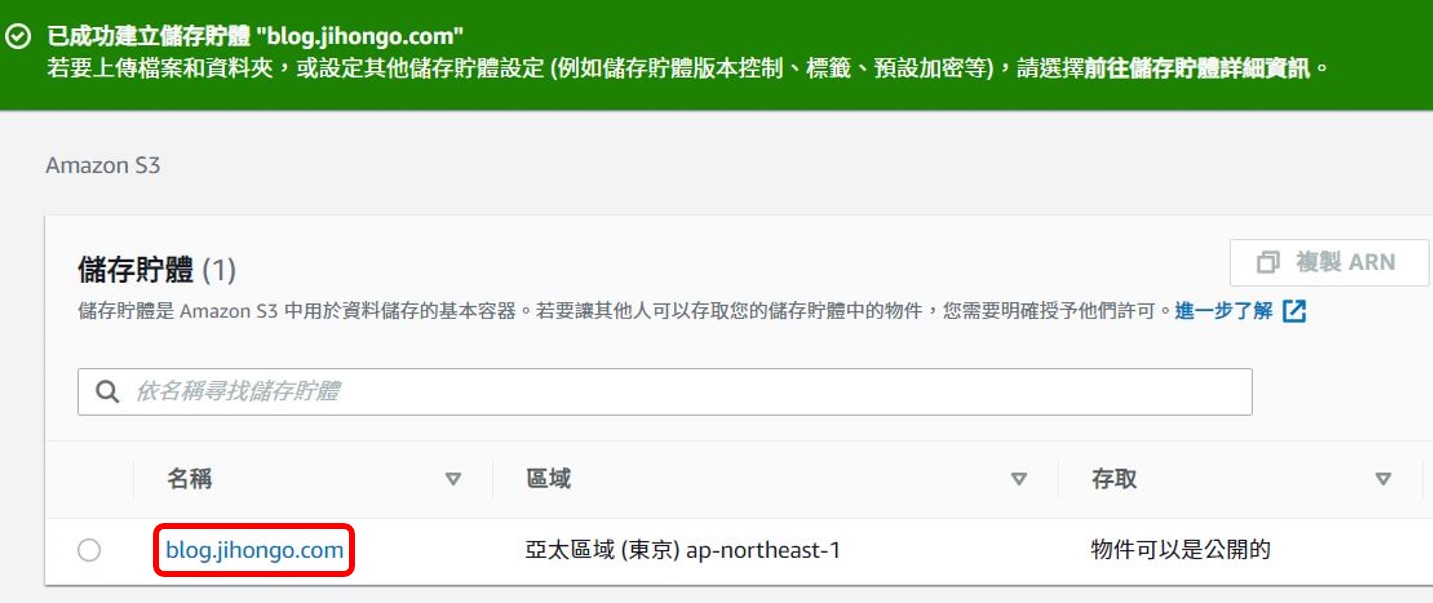
click the bucket name
Switch to Properties tab and click Static website hosting
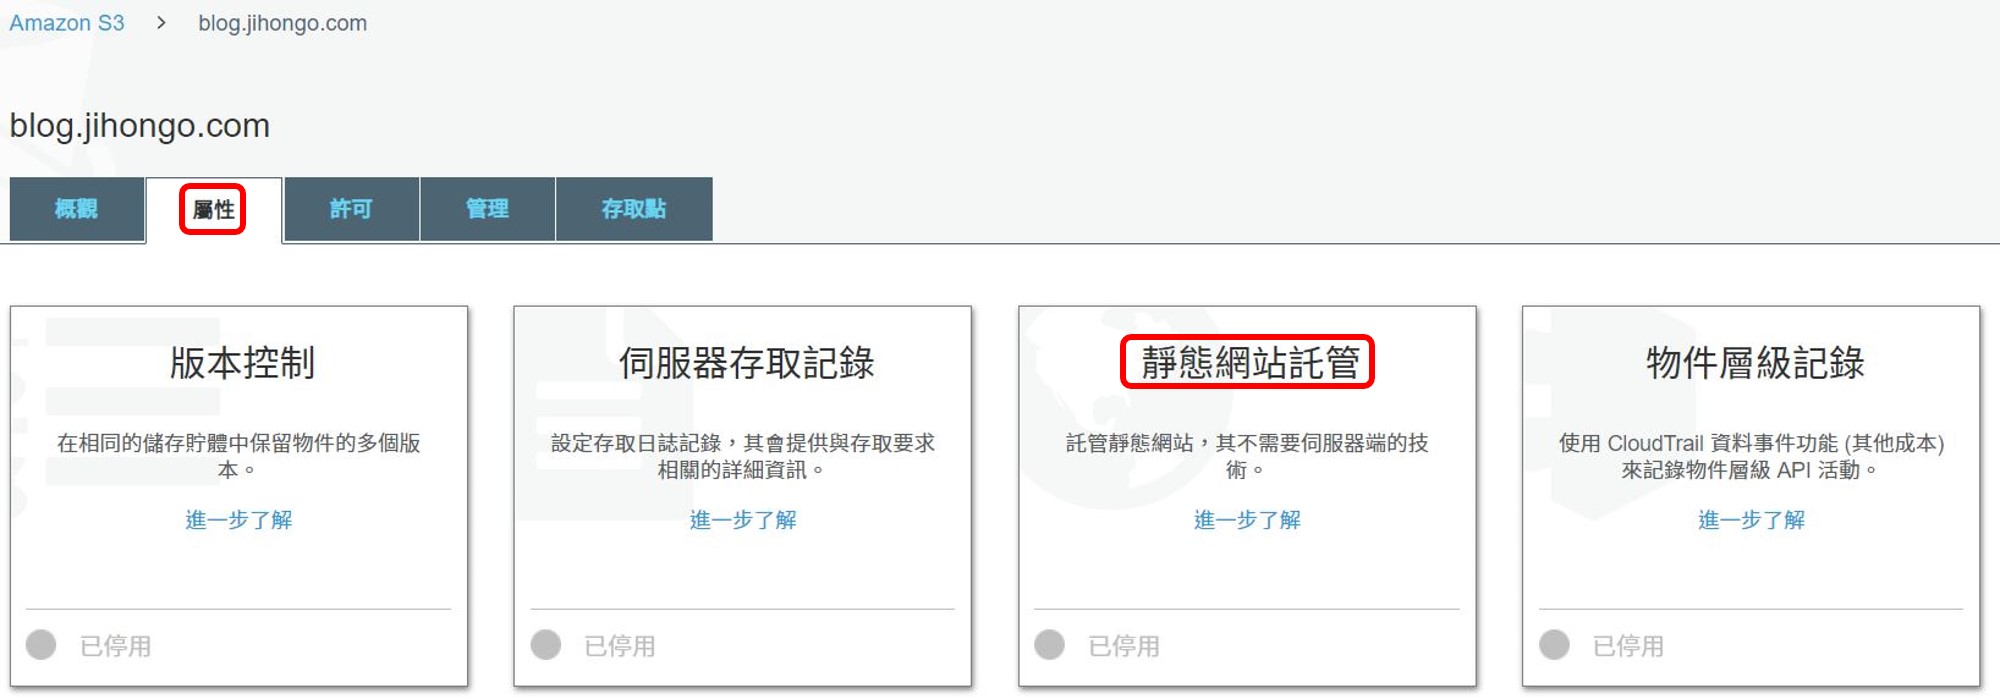
Select Use this bucket to host a website
Index document fill in index.html
Error document fill in 404.html
Copy the link of Endpoint, it will be used later.

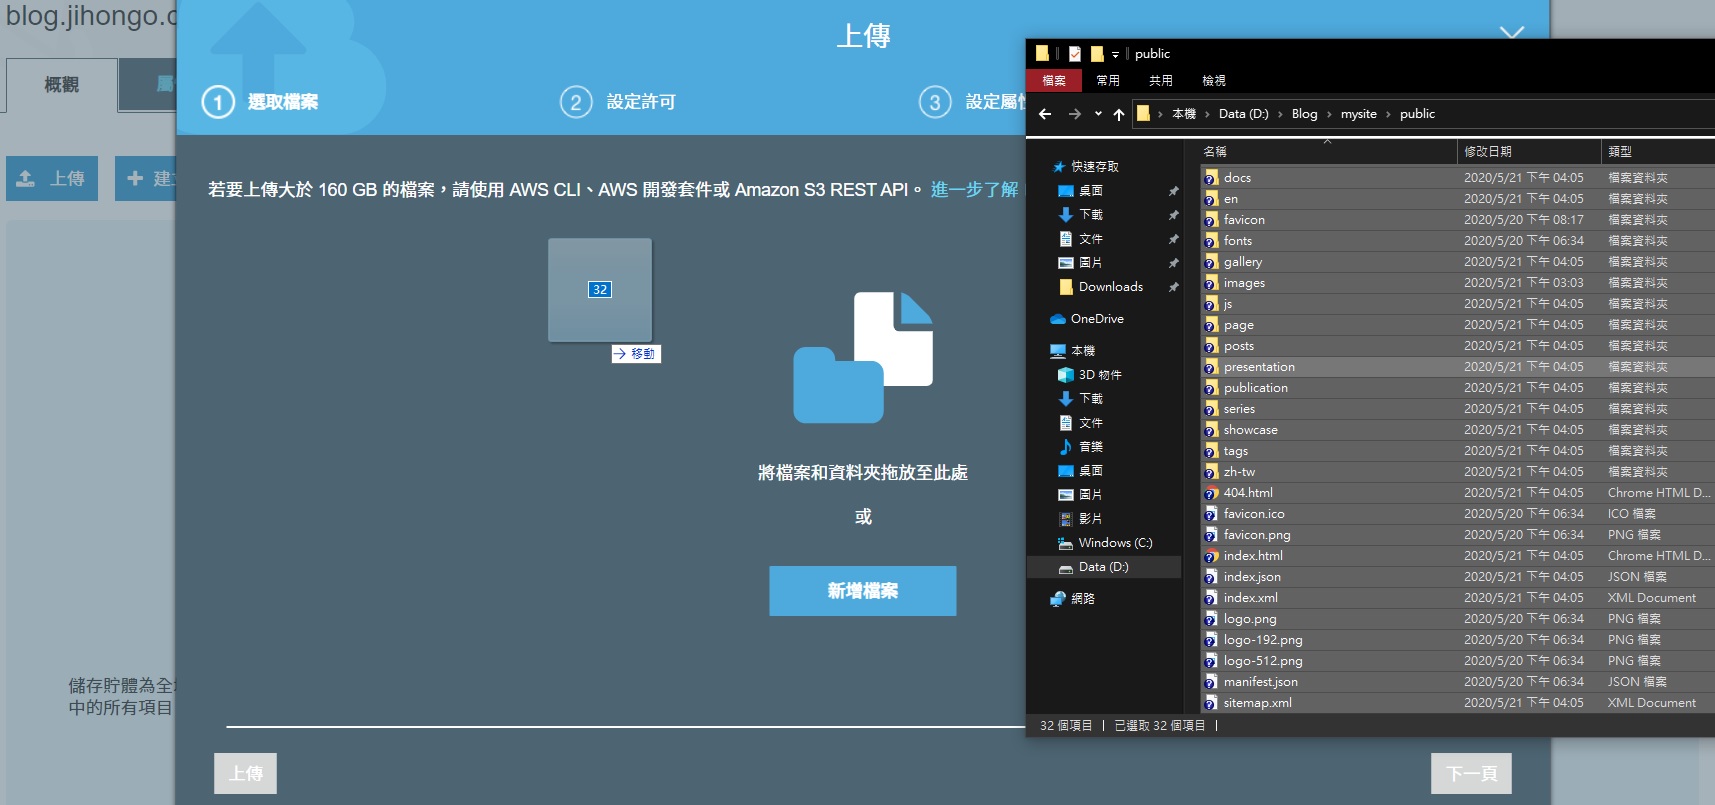
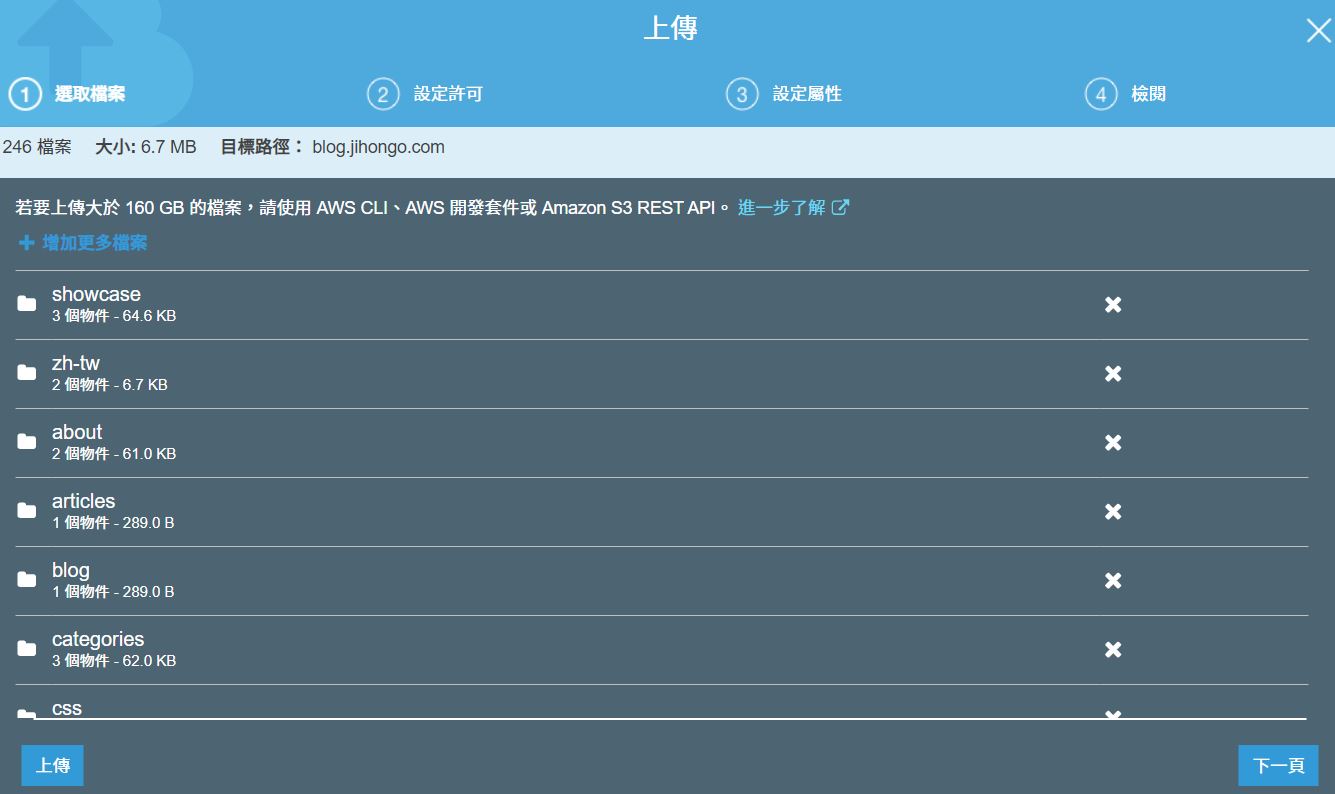
Switch to Overview tab, upload all your files from the public folder.
(DO NOT directly upload the public folder)
Grant public read access to this object(s)
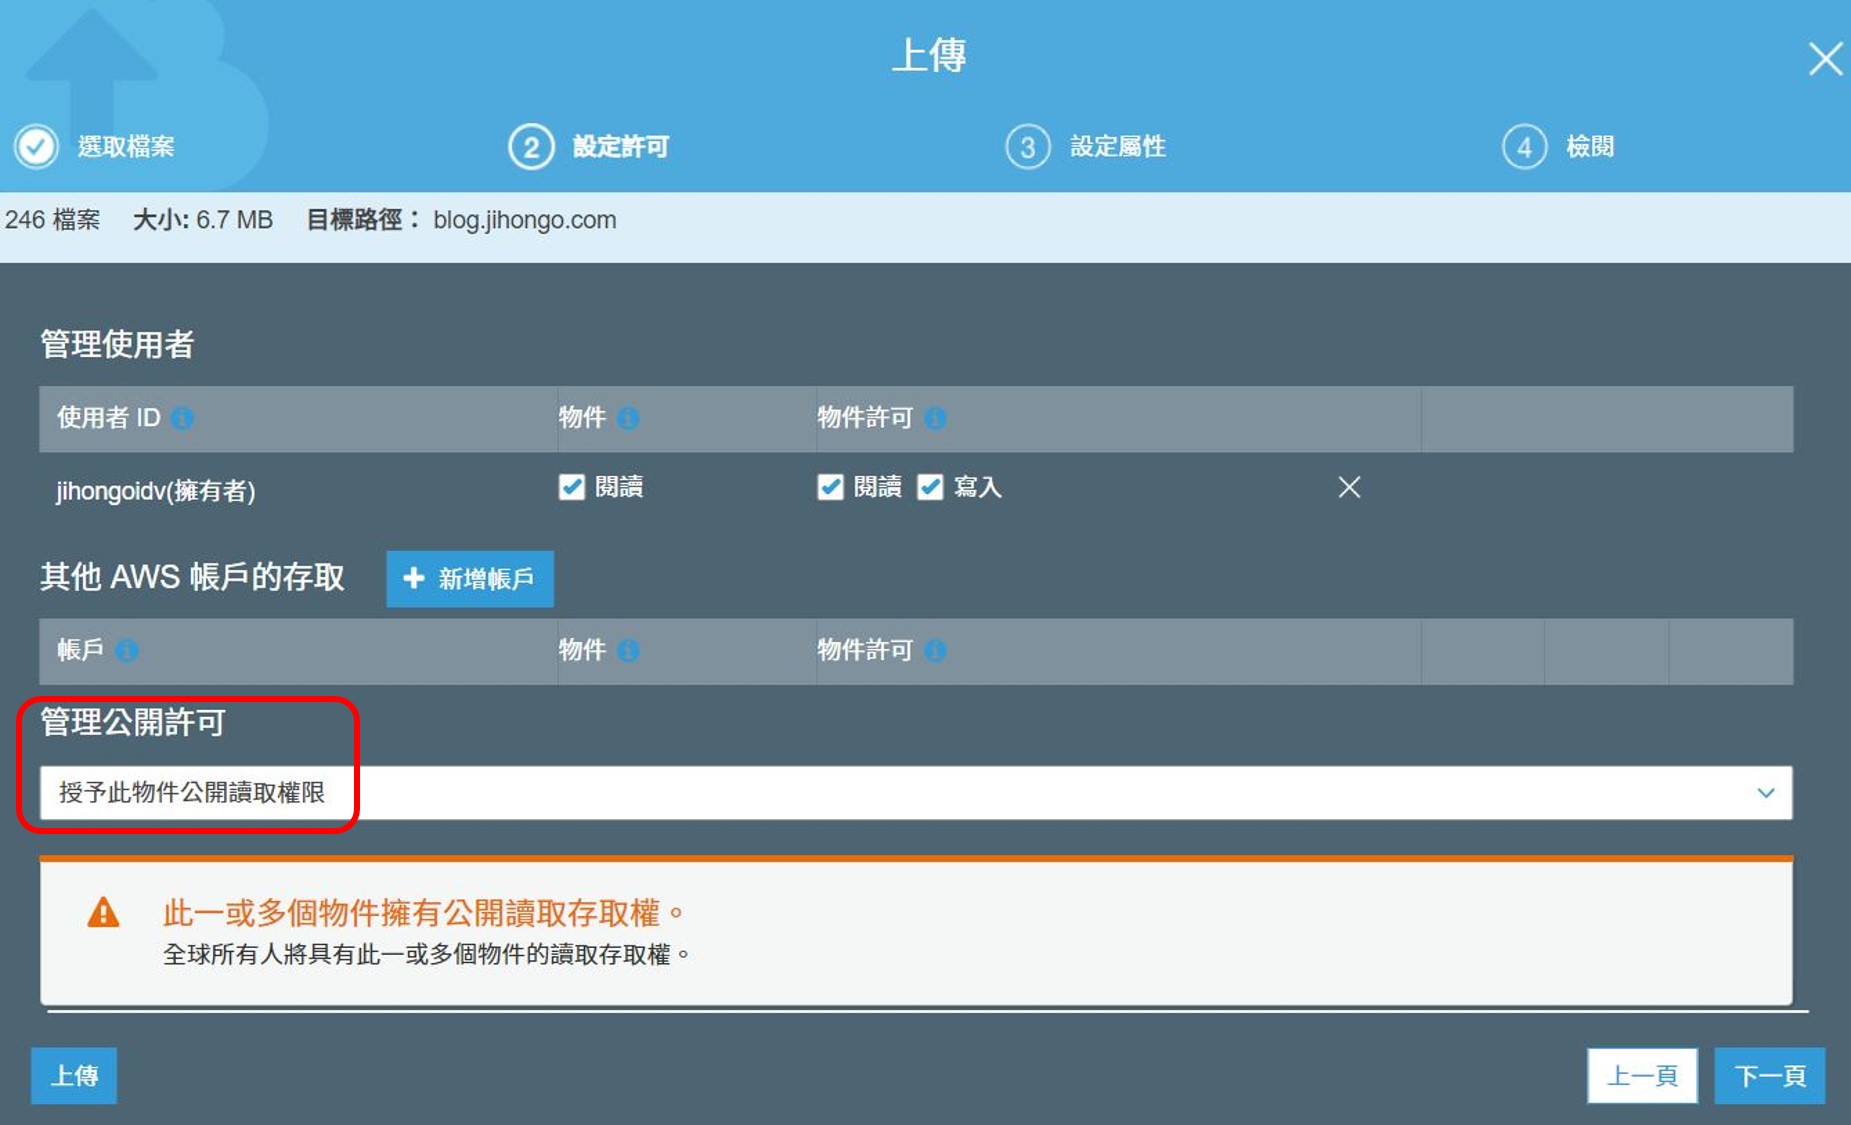
Standard
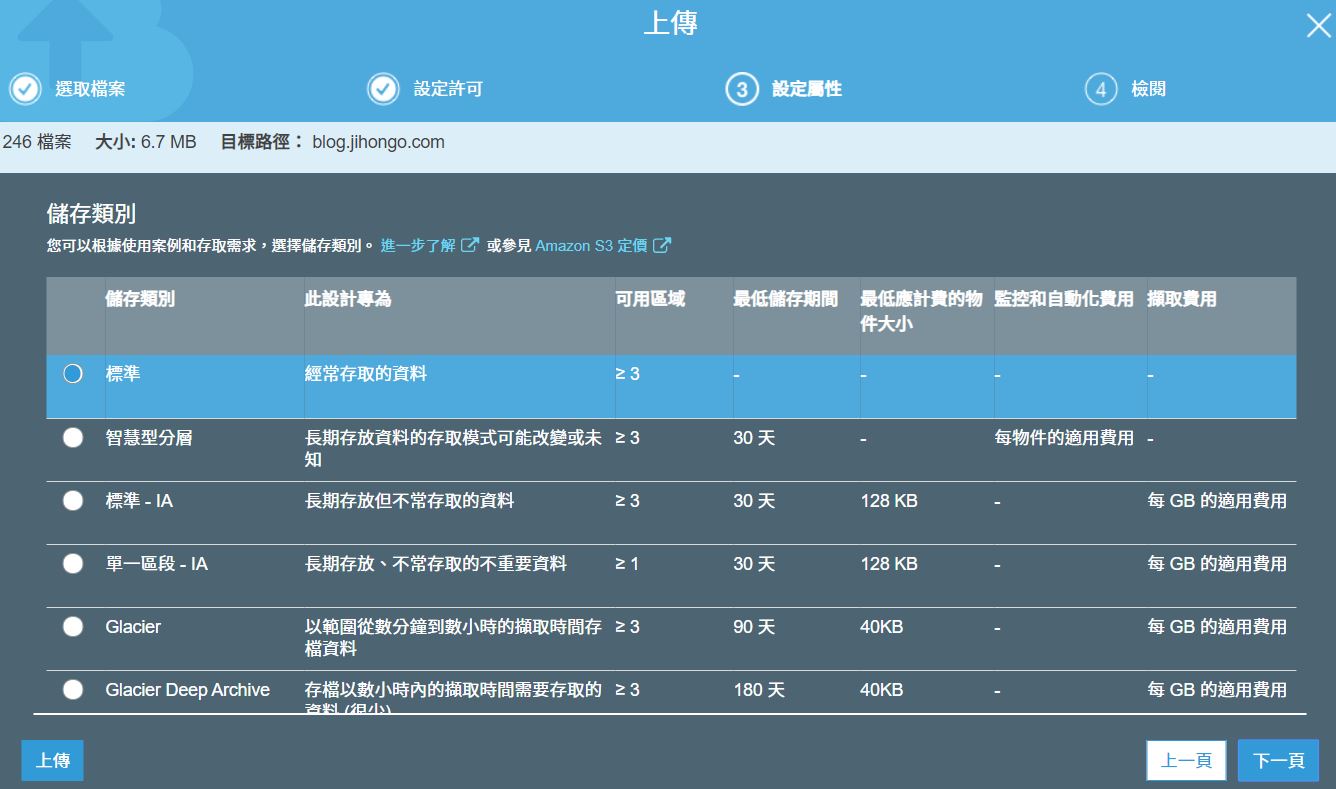
Upload
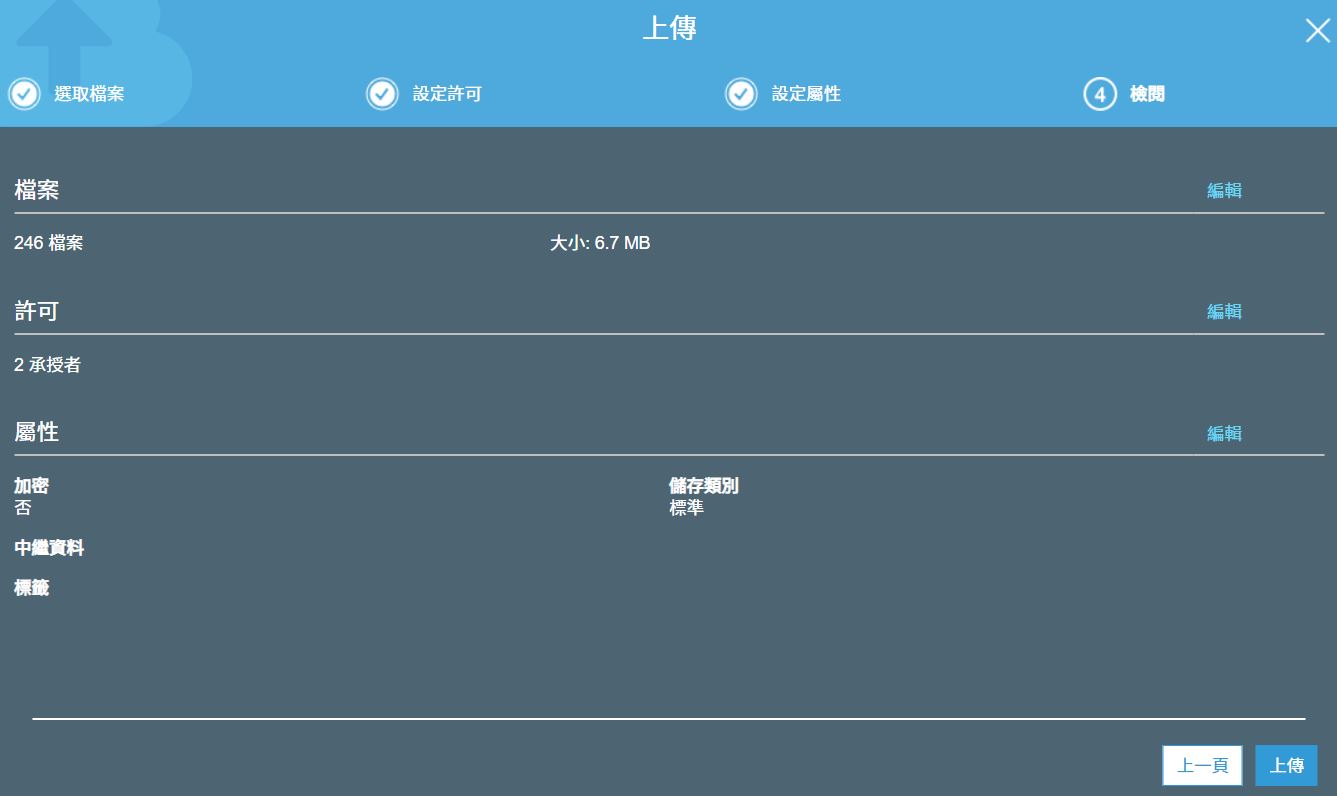
OK
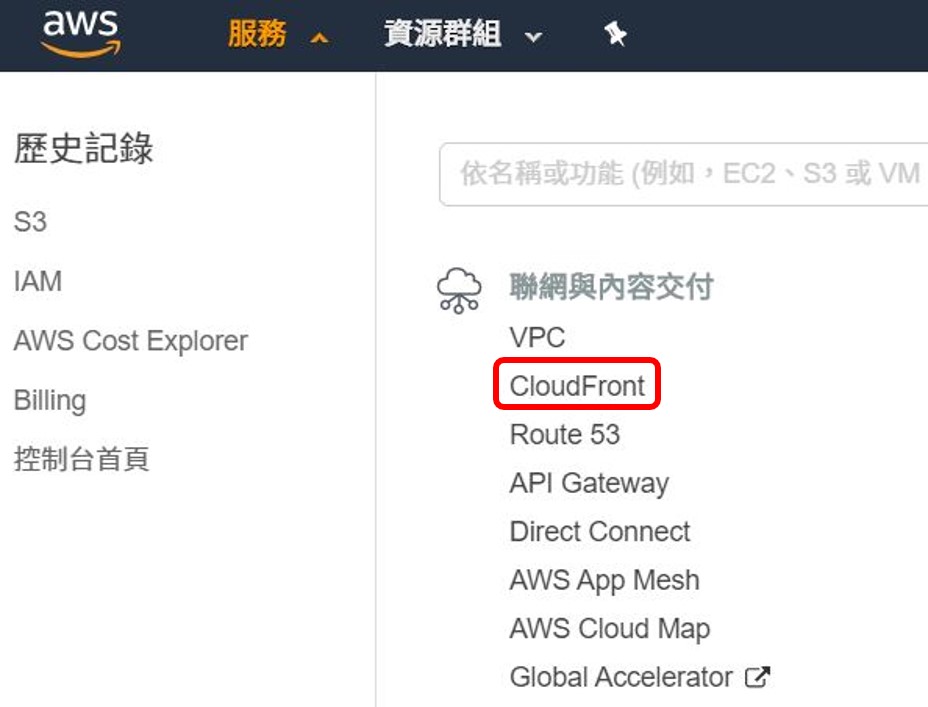
CloudFront
Click CloudFront
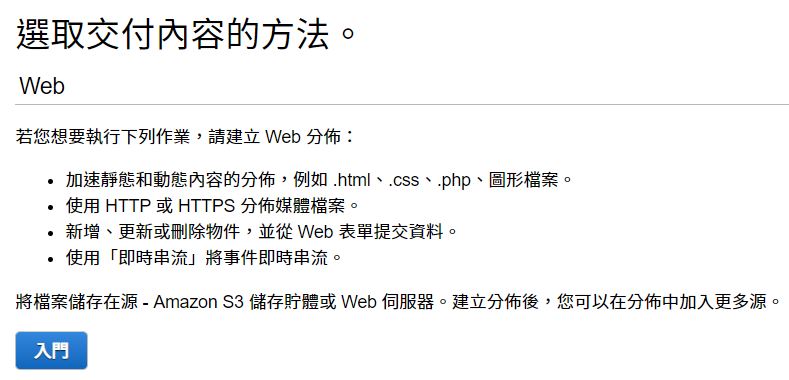
Click Create Distribution

Click Web
After forward the page,
swipe to the middle to Request or Import a Certificate with ACM
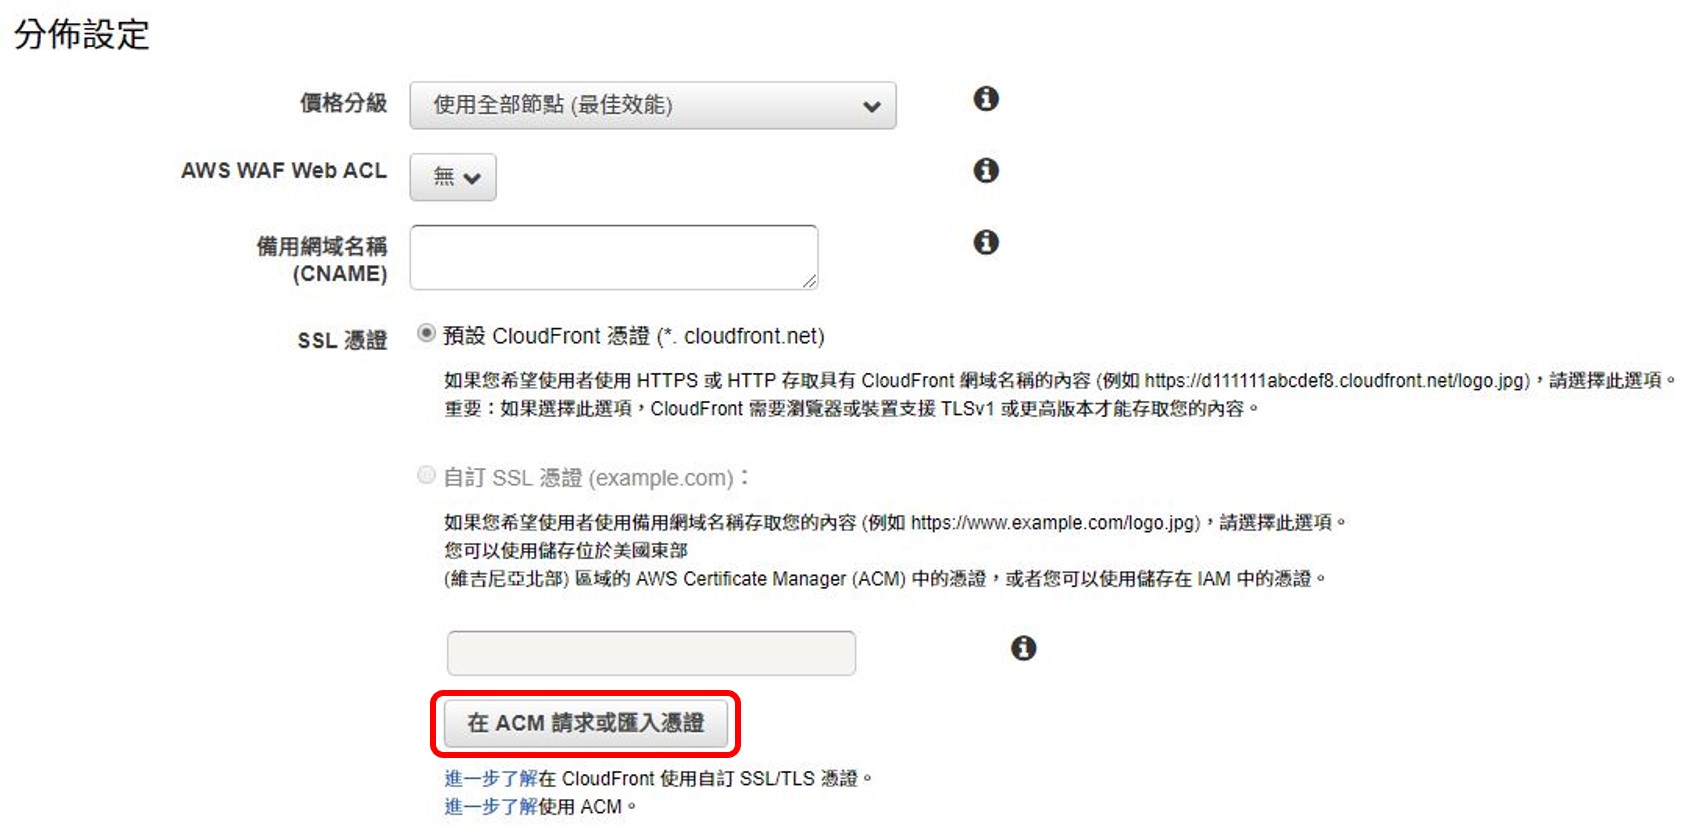
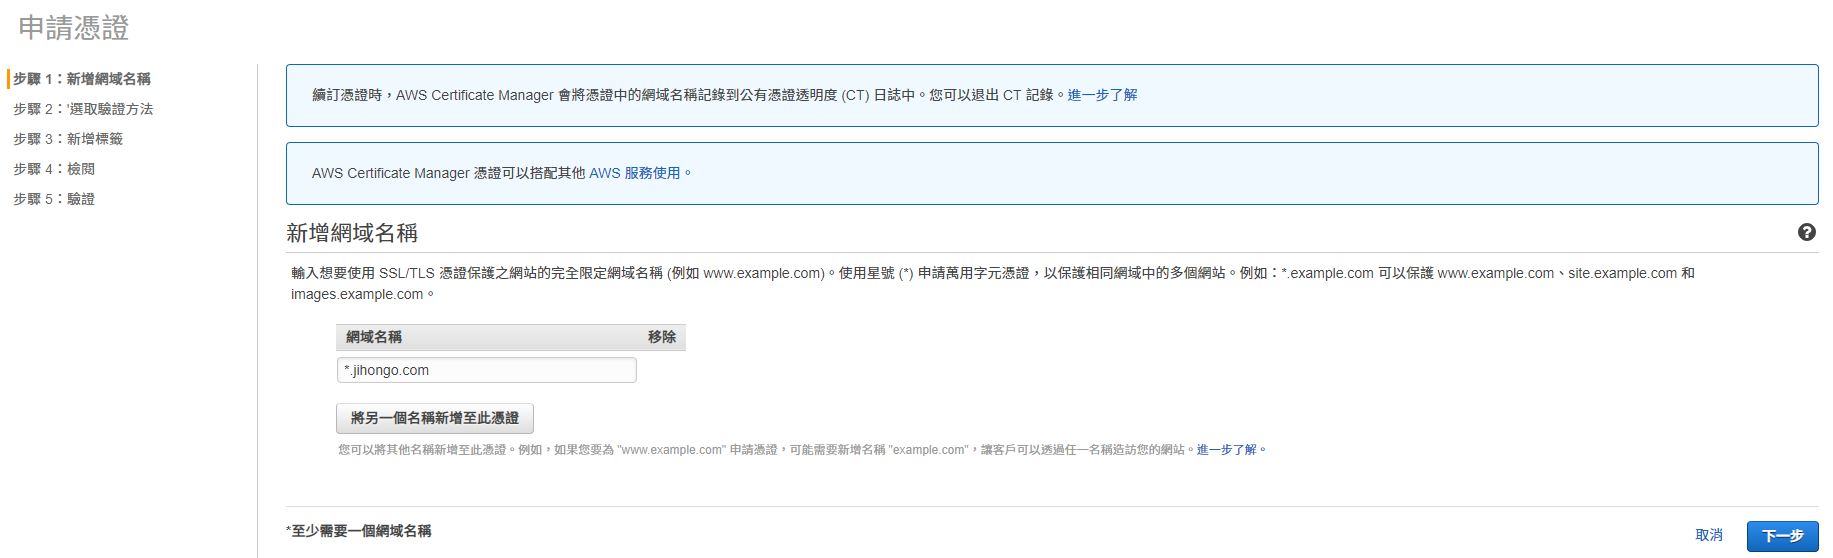
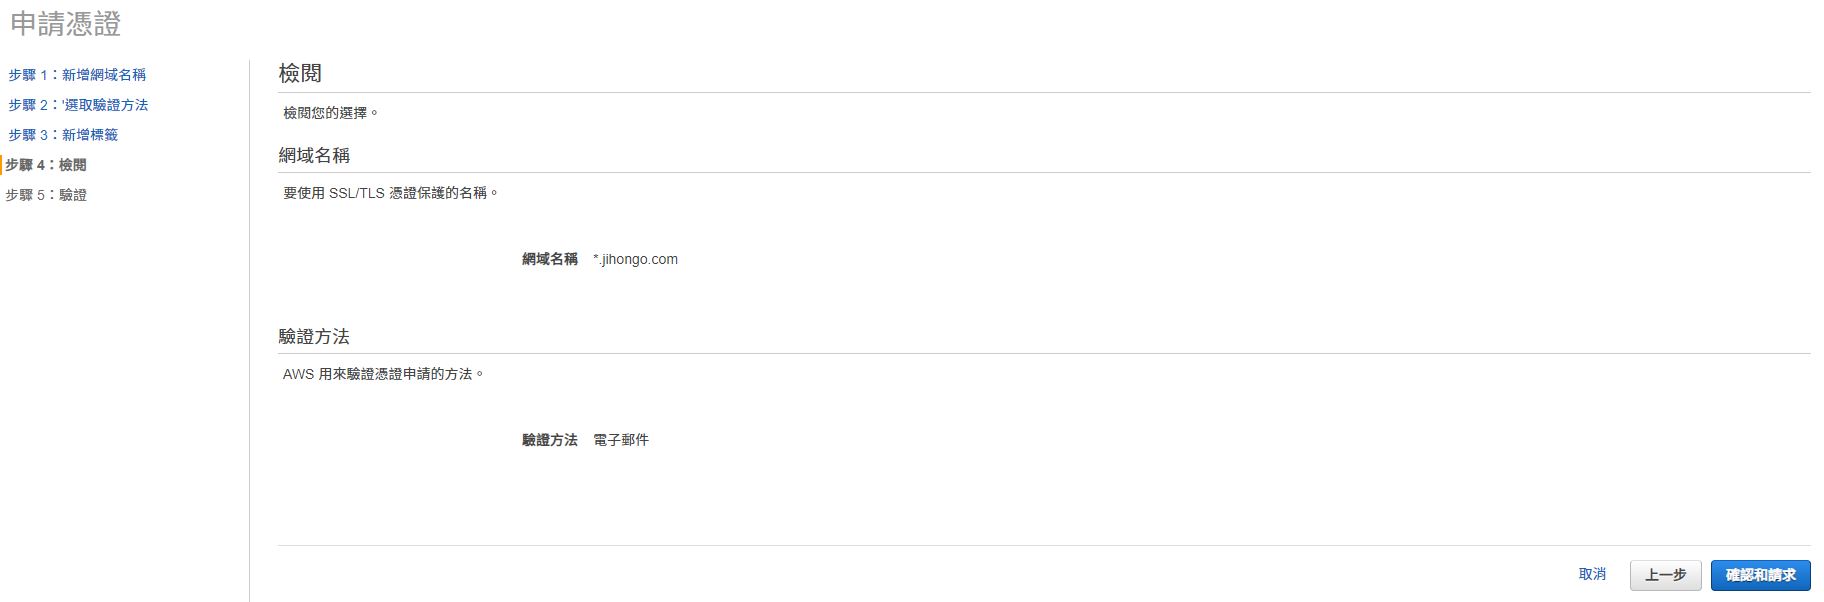
Fill in *.YOUR_DOMAIN_NAME
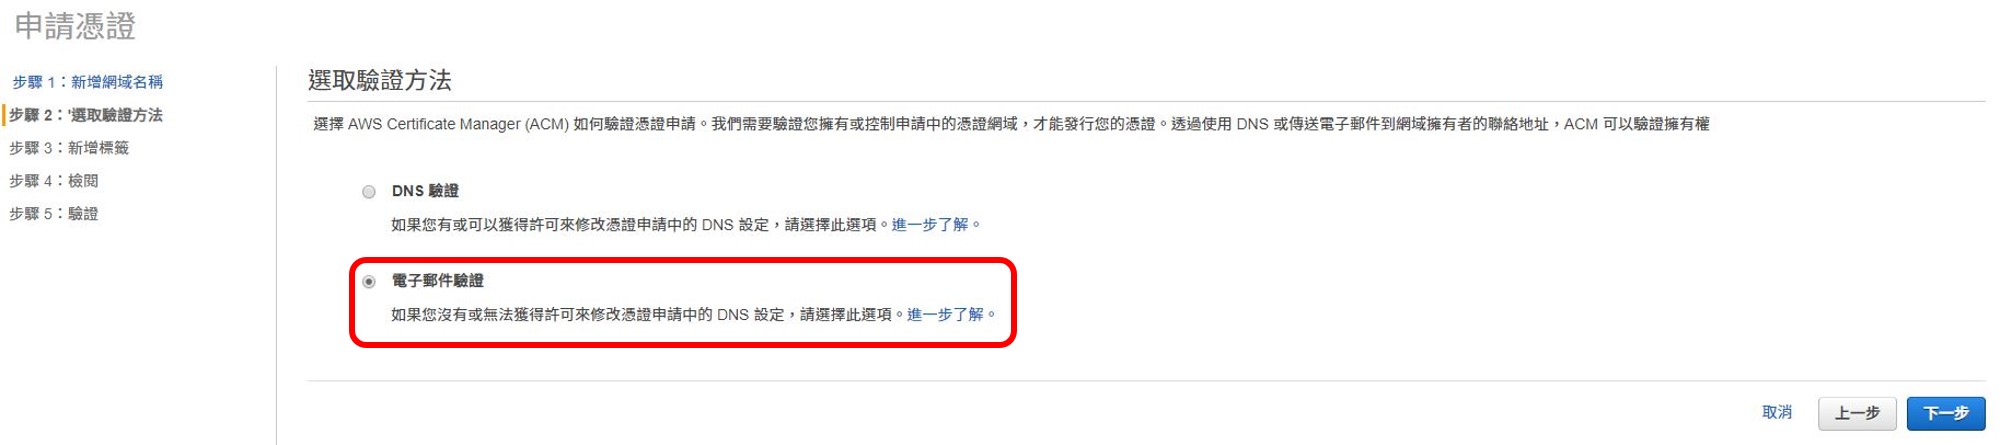
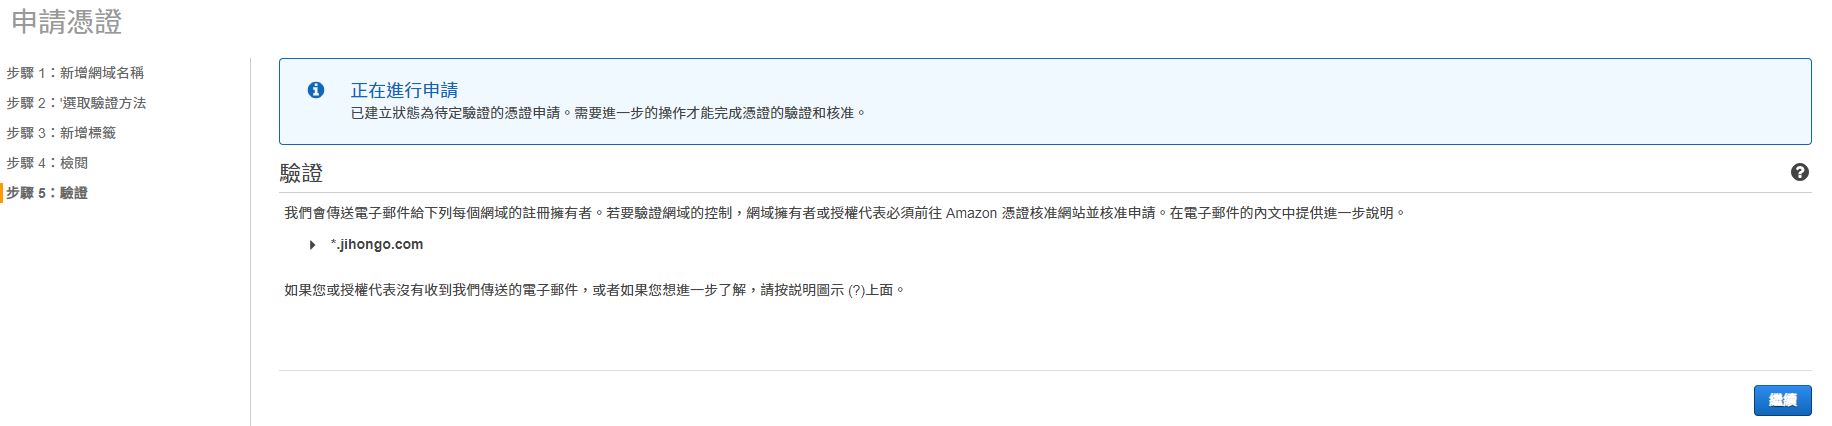
Select Email validation or DNS validation
Here use Email validation
I do not add tags

Review
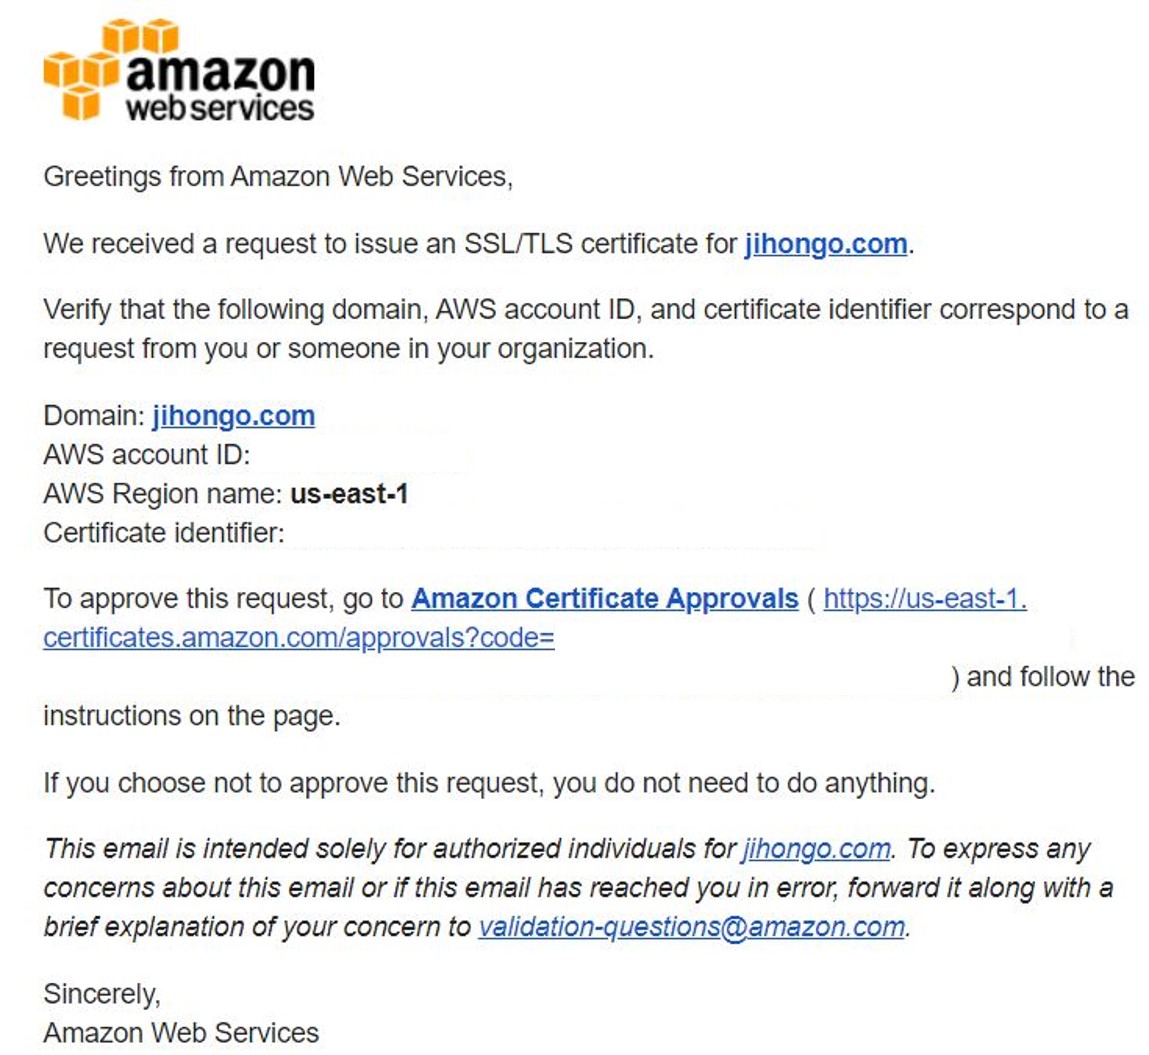
You can check which e-mail it will send to, and make sure you can receive it.
One is admin@YOUR_DOMAIN_NAME
My domain was purchased from Google Domains
Add admin@YOUR_DOMAIN_NAME and forward it to your own e-mail.

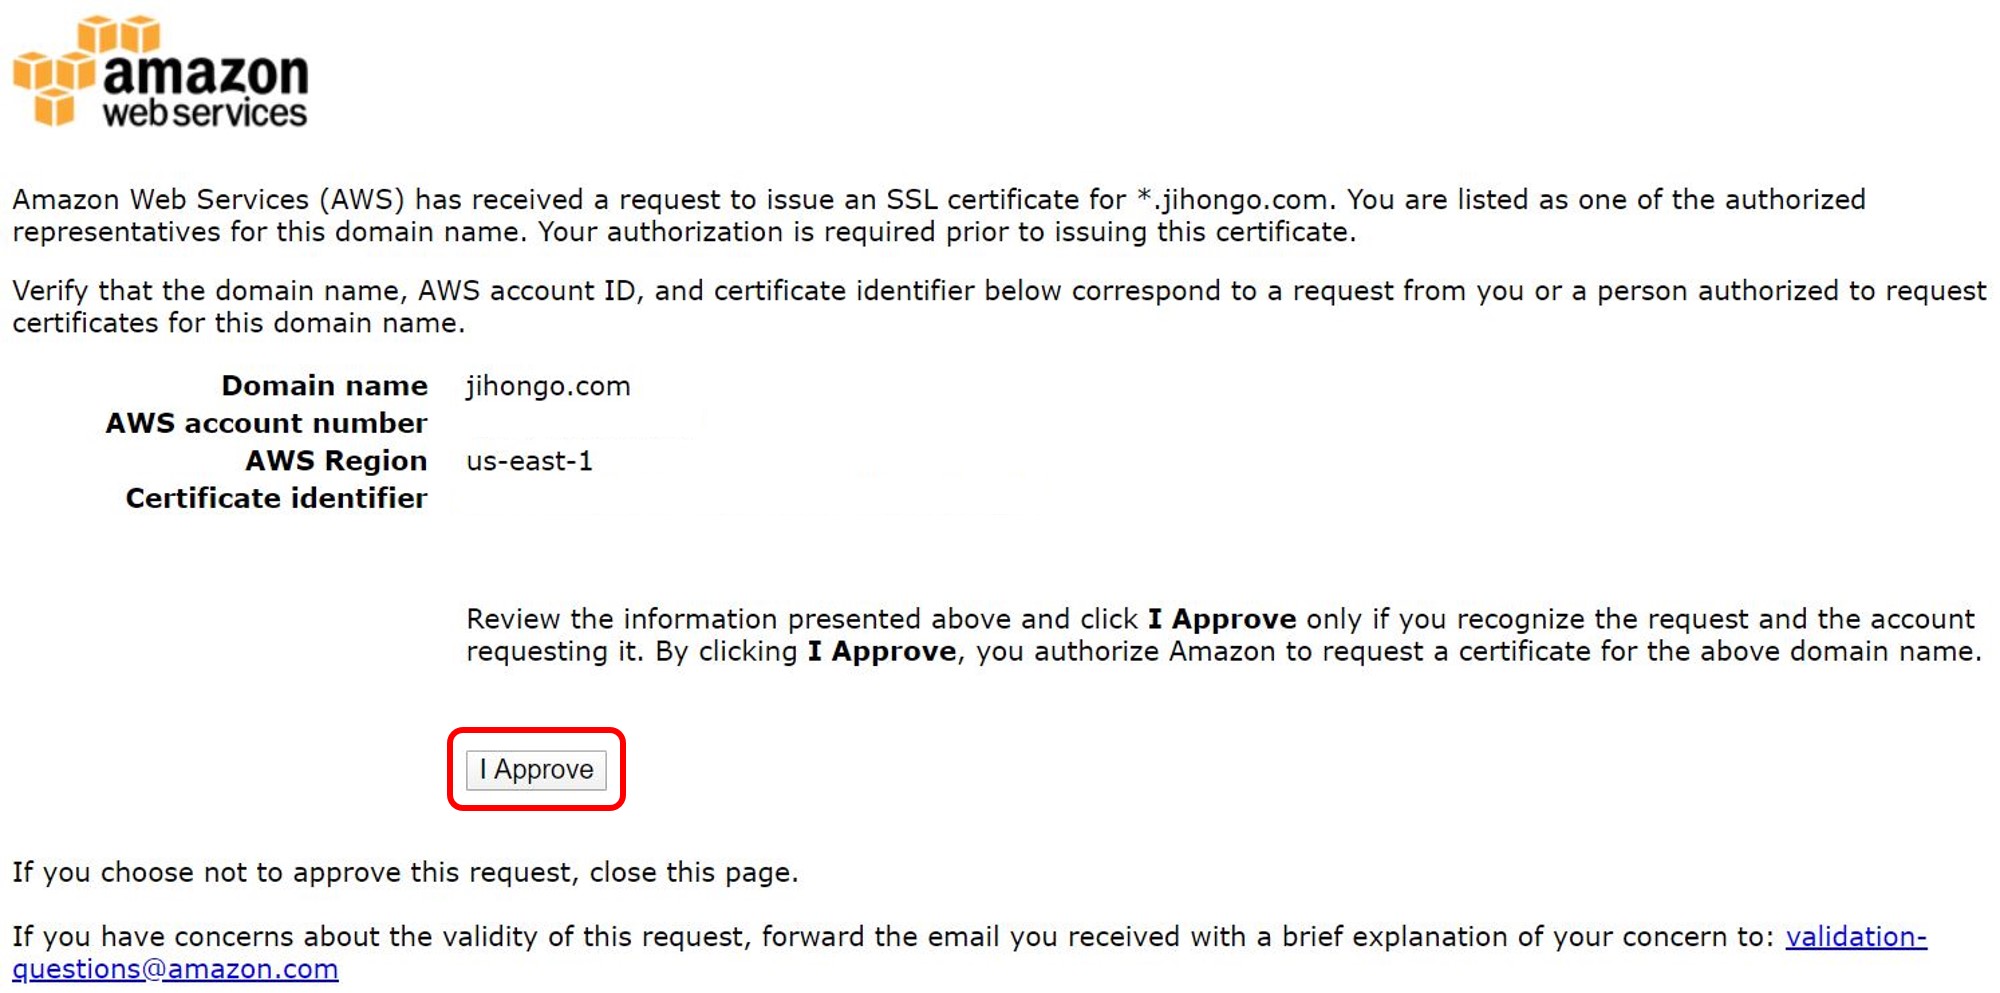
Valid it
Click I Approve
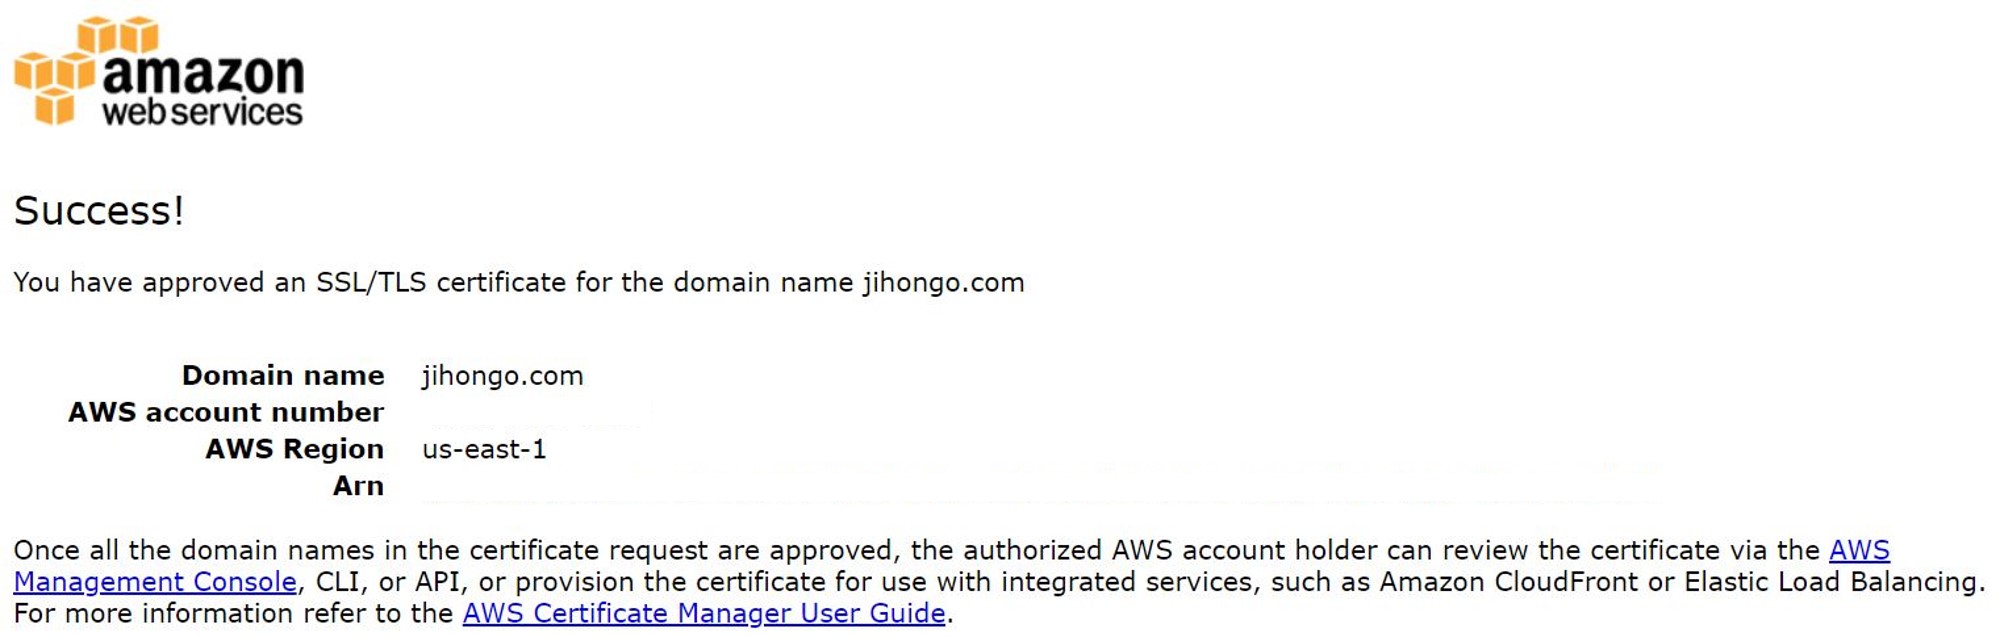
Success
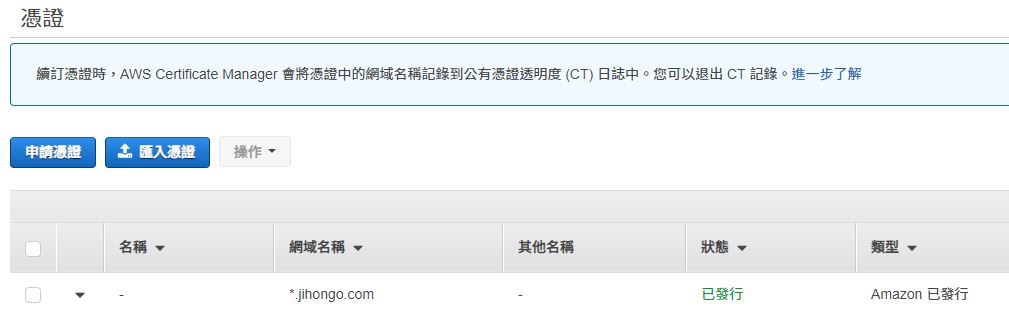
Go back and refresh AWS Certificate Manager tab, the State will be Enabled.
Go back to the Create Distribution page.
Origin Domain Name select Amazon S3 Buckets
Viewer Protocol Policy select Redirect HTTP to HTTPS

Enable Compress Objects Automatically

Price Class depends on you
Fill in the Alternate Domain Names
Select Custom SSL Certificate
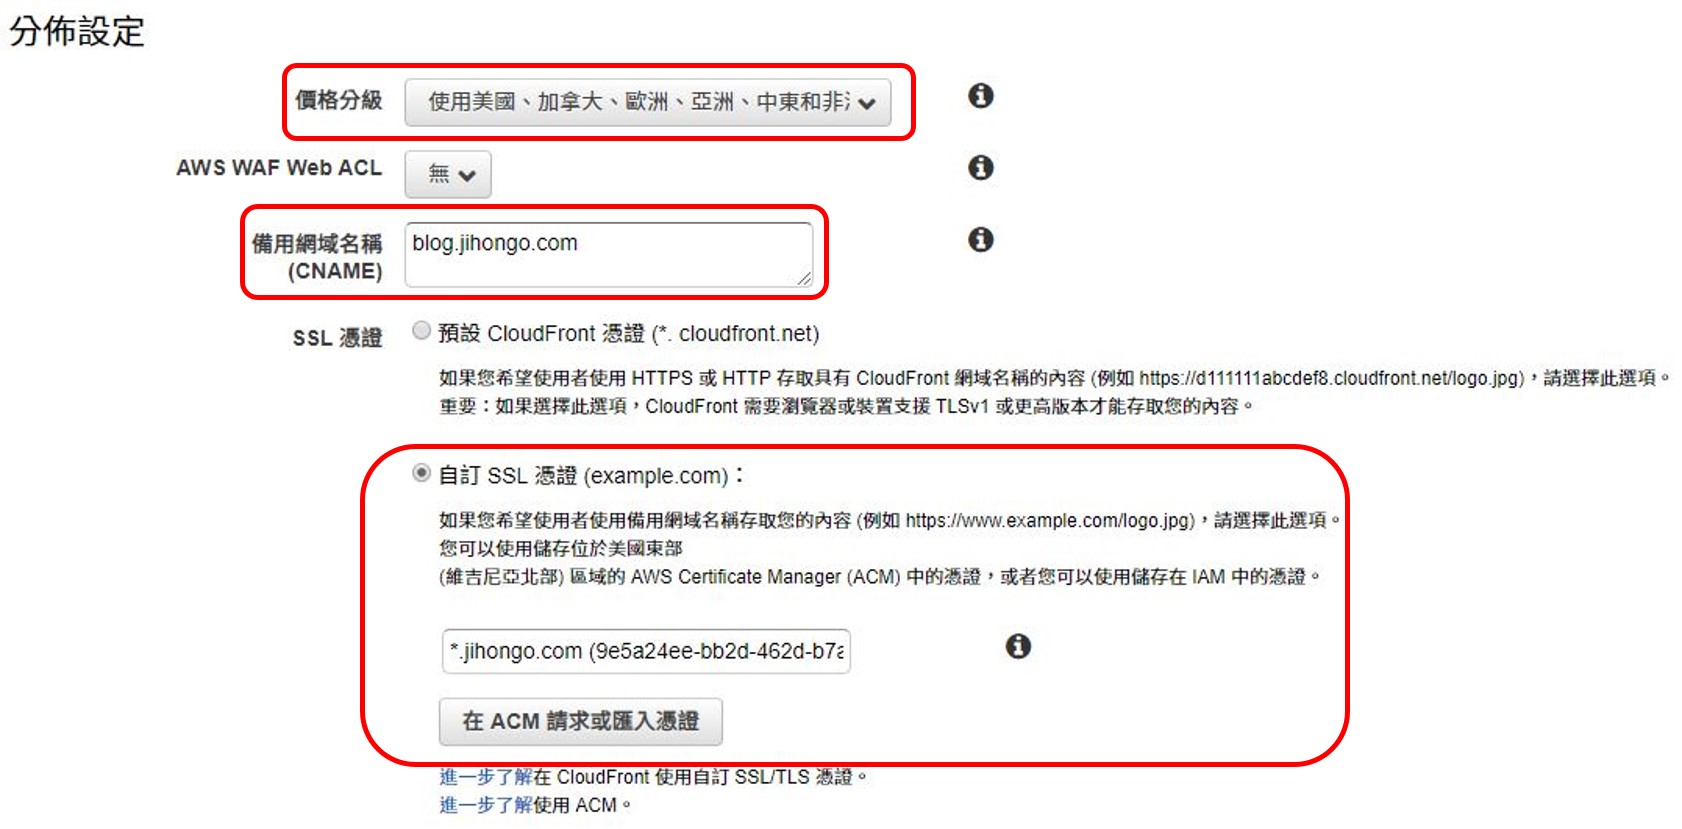
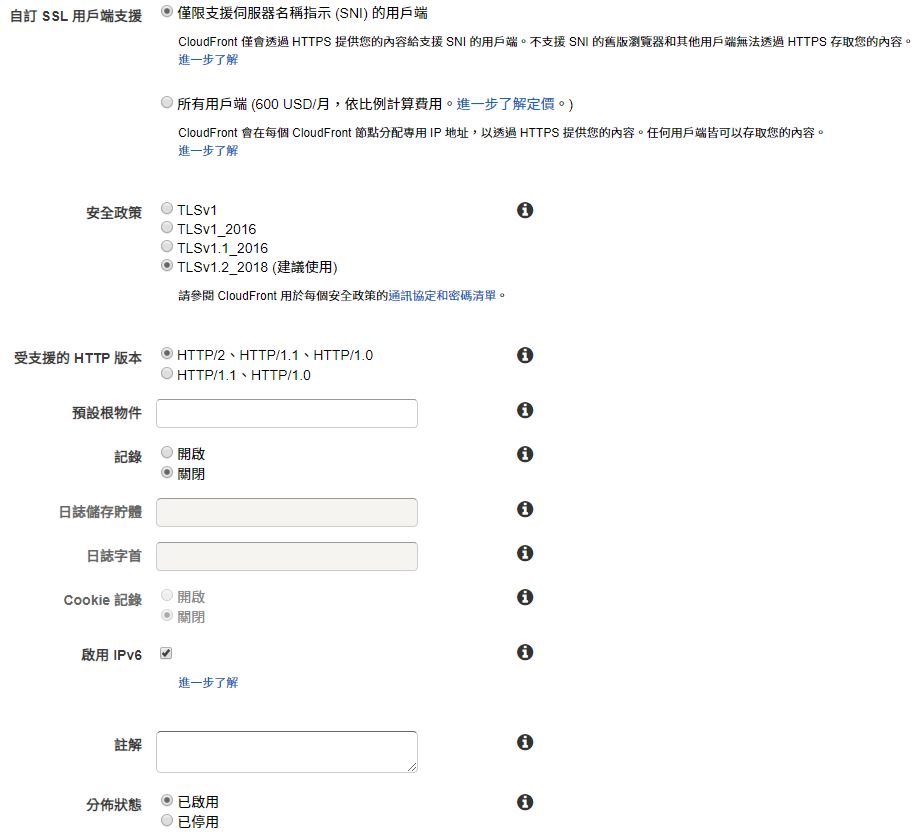
Others set default
After create distribution and wait for some time, the Status will change to Deployed.
Copy the Domain Name YOURS.cloudfront.net, use it later.
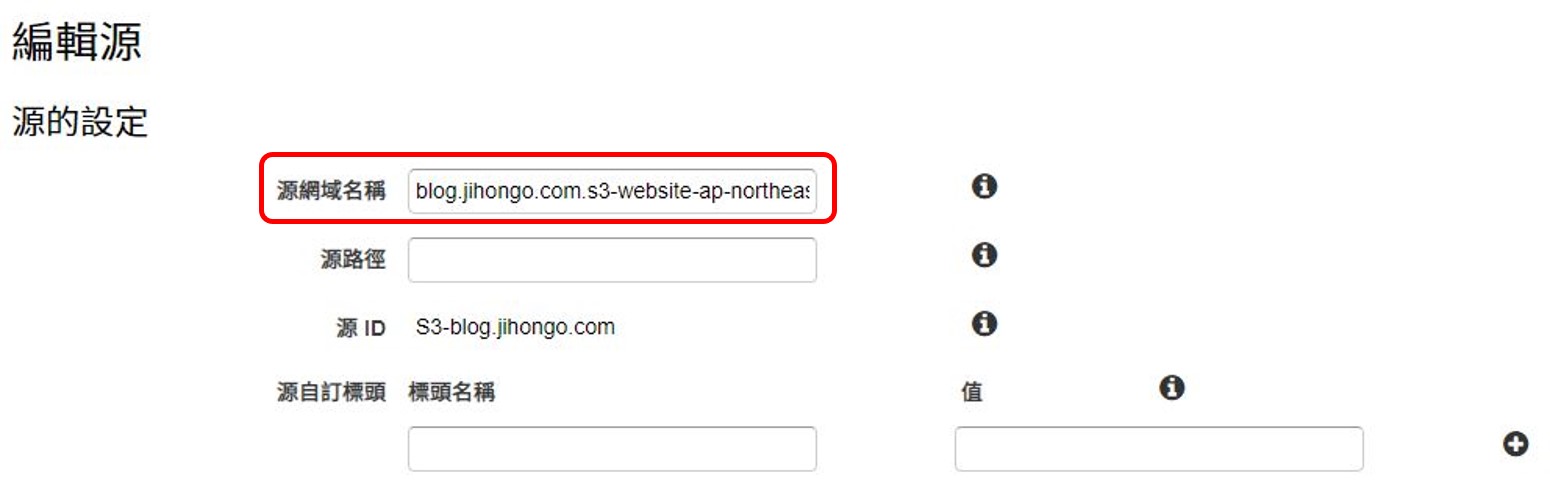
Click ID to configuare.

Switch to Origins and Origin Groups tab, select it and edit
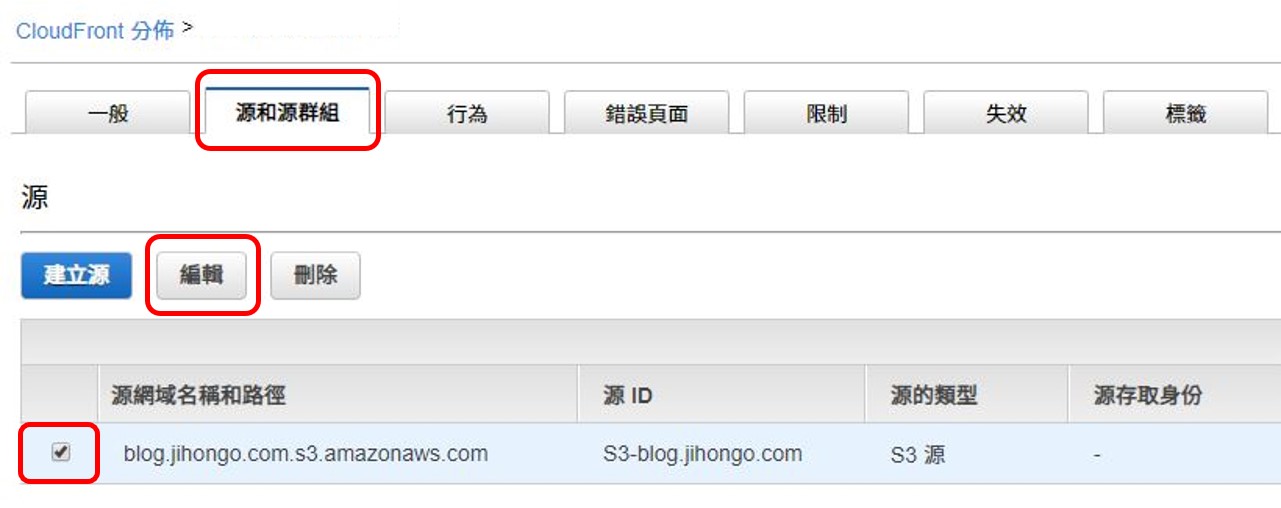
Paste the link of Endpoint to Origin Domain Name
If you have uploaded a static website and the settings are all right.
You can see your static website (HTTP) by entering the link of Endpoint in the browser
You can also enter YOURS.cloudfront.net (HTTPS)
Finally, go to your domain name provider.
Add a type: CNAME, data: YOURS.cloudfront.net
For me, CNAME = blog
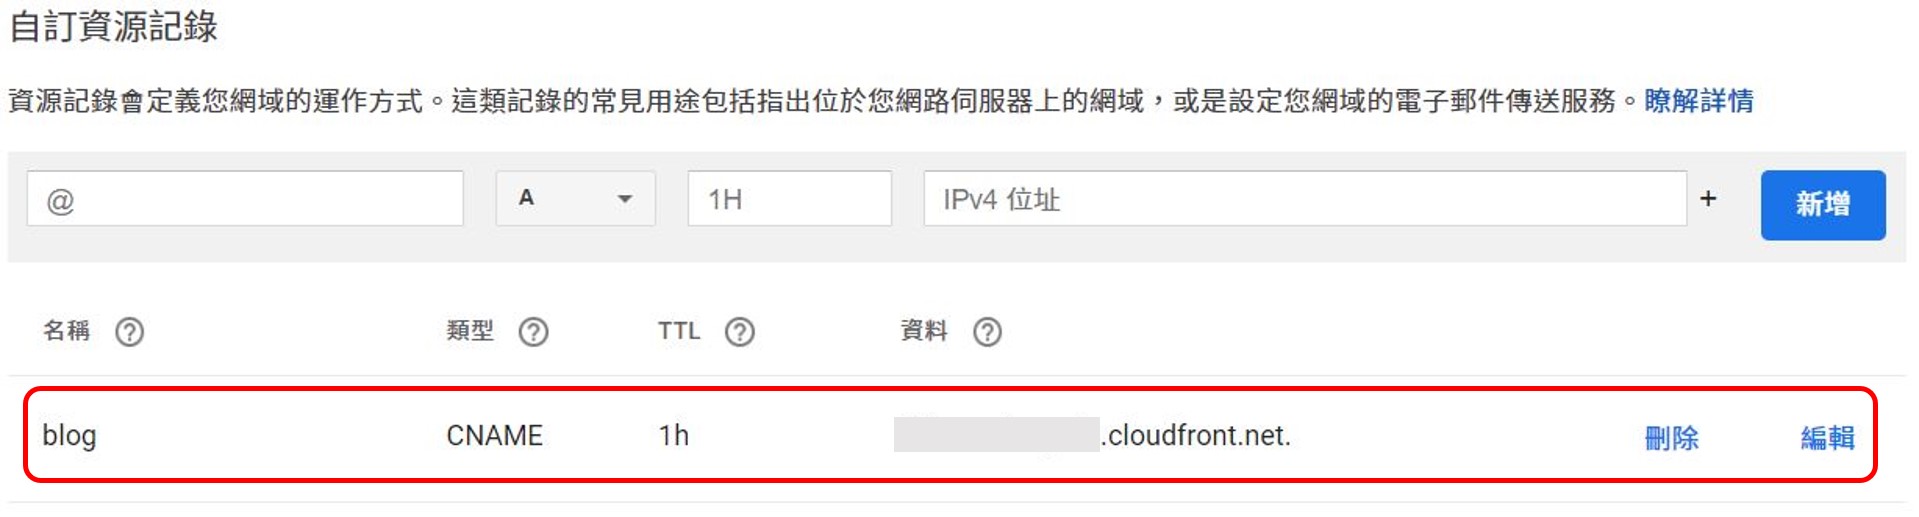
Wait for some time, it will work.

Done