Prepare
- Your own domain (How to buy a domain name from Google Domains)
- Static website (How to create a static web by Hugo)
- GitHub Account
- Netlify Account
- Git basic
Netlify Intro
Netlify is a popular static website Host service,
and its free quota is very suitable for general users
You can customize the subdomain or use your own domain name,
and also provide free SSL
It is very convenient that Netlify will automatically deploy when push to GiuHub Repository
Preare your static website
Here is an example created by Hugo (How to create a static web by Hugo)
First, add netlify.toml to root of your site workspace
Note that HUGO_VERSION
|
|
Use git
|
|
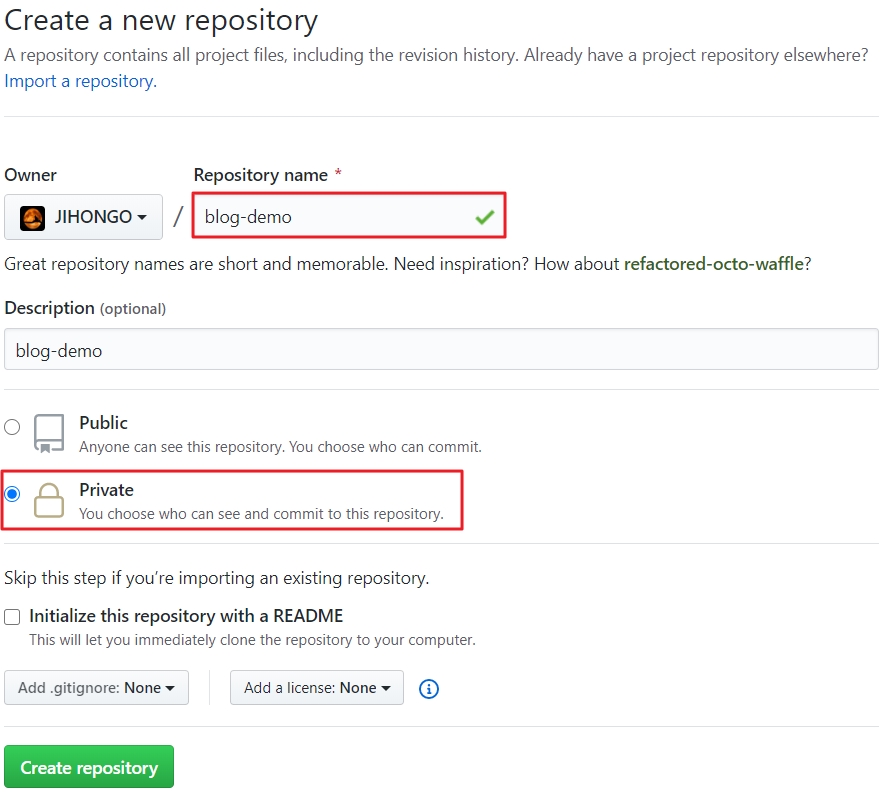
Go to GitHub create a repository (private is allowed)
Copy the repository link
https://github.com/YOUR_GITHUB_NAME/REPOSITORY_NAME.git
Push local to GitHub
|
|
You can see your files on GitHub Repository
Deploy on Netlify
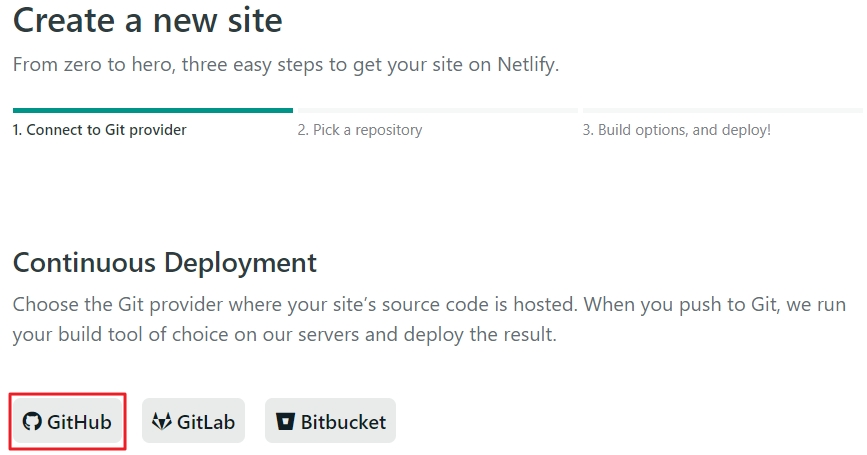
Go to Netlify, login and click New site from Git

Click GitHub
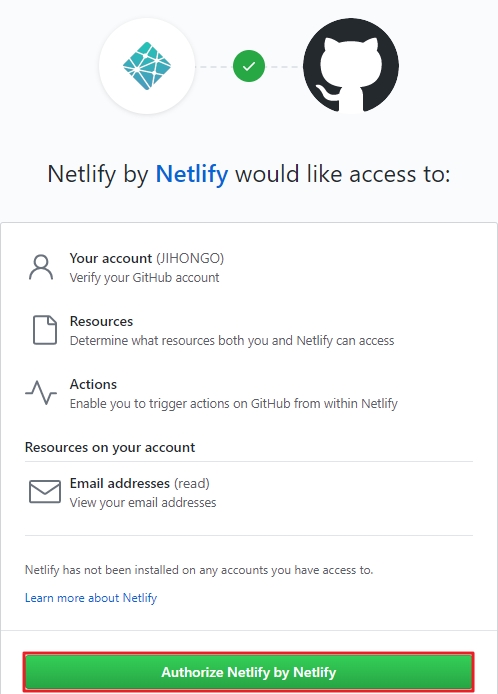
Authorize Netlify access GitHub
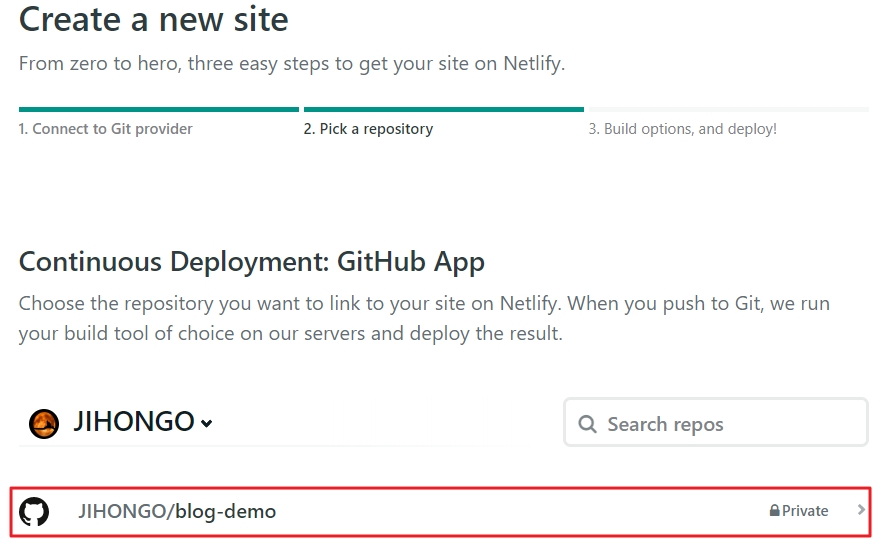
Select the repository
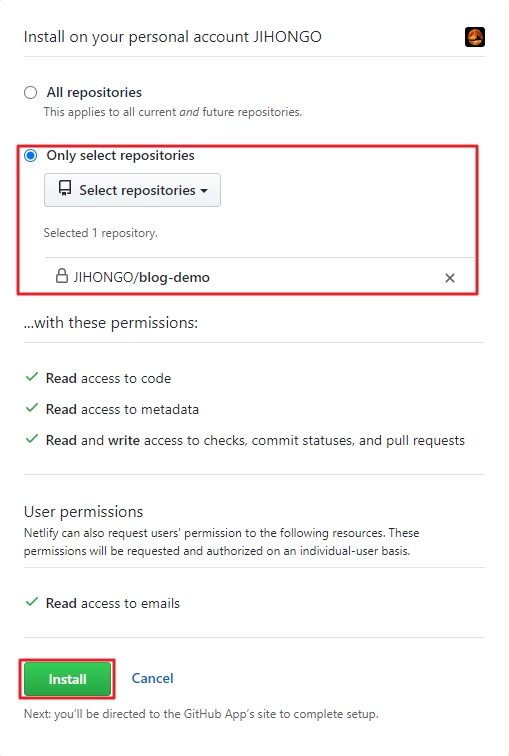
Click it
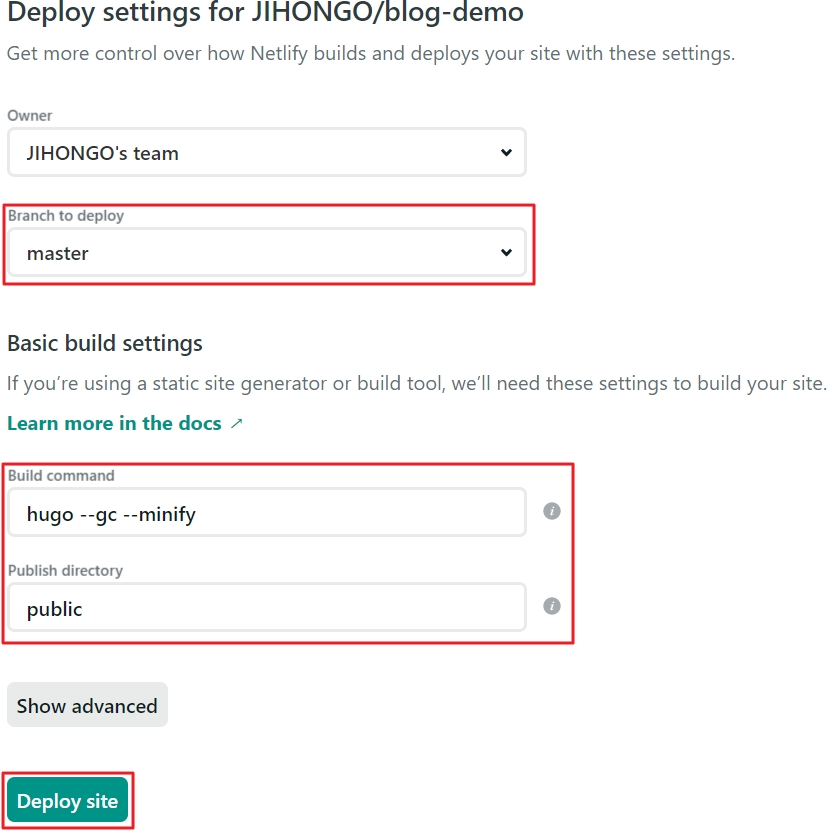
configuration has been read from netlify.toml
Deploy site
I Failed…
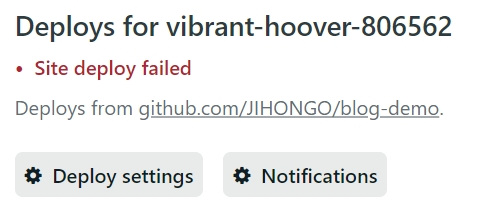
Here is the error
Error: Error building site: failed to render pages: JSON parse error: unexpected comma character on line 9 and column 20
    9:     "description": ,
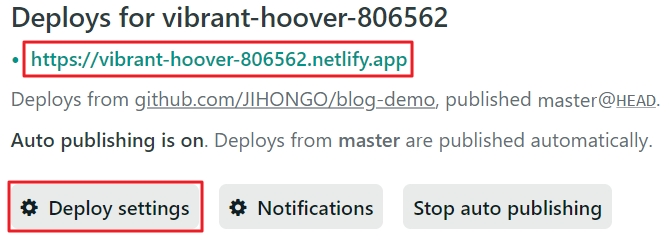
I don’t find the reason, so decided to remove --minify
It works.
Then change to your own domain, click Deploy settings
Switch to Domain management tab and click Add custom domain

Fill in your domain name
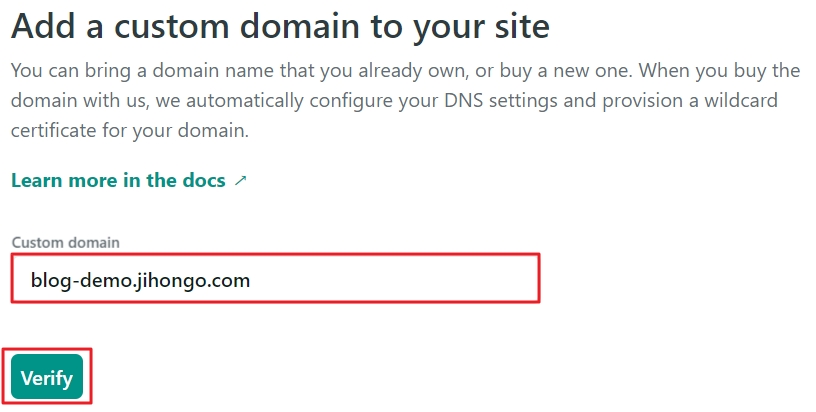
click Check DNS configuration

Copy that text, go to your domain name provider and add CNAME
Wait for a few minutes

Back to Netlify and click Verify DNS configuration
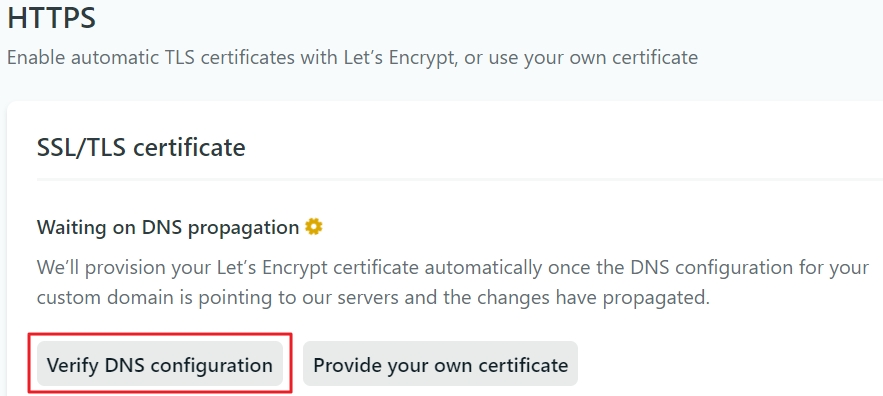
If there is no problem, it will succeed.
Done